[XMOD]: BRN-180 STOCK SLING LOOP
Author: Frank Woods
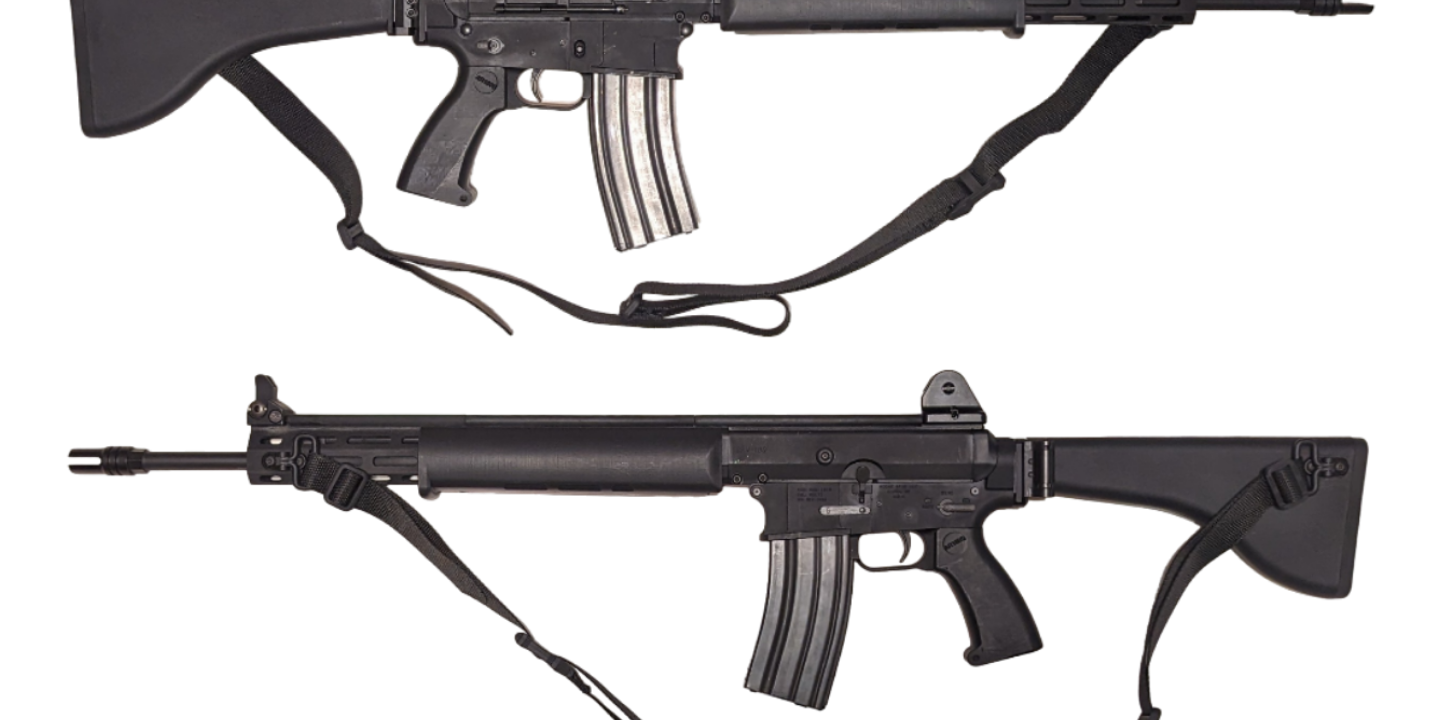
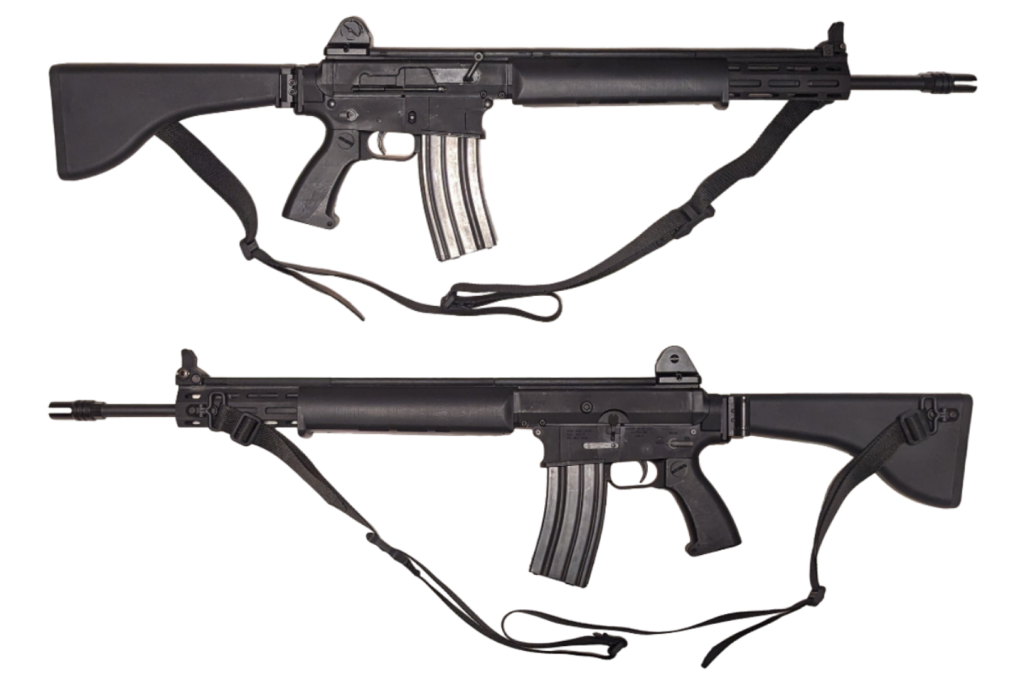
I’ve written about my BRN-180 and the modifications I’ve made to its configuration in the past. Now I’m revisiting it to focus on a particular experimental modification (hence “XMOD,” since it’s something we do with our guns sometimes) I made to the retro-style folding stock made by B5 Systems for Brownells’ BRN-180 product line. After that I’ll go more in depth on other retro-mods to my BRN-180 I’ve made since I last wrote about it to make it a more retro than modern rifle.
BACKGROUND & CONCEPT
So the reason for this modification is actually ironic given how much effort I’ve put into all the retro-mods on this rifle; there’s never really been a good way to use a two-point sling on a conventionally configured AR-180– not in a functional way, at least. Cause this is bullshit:
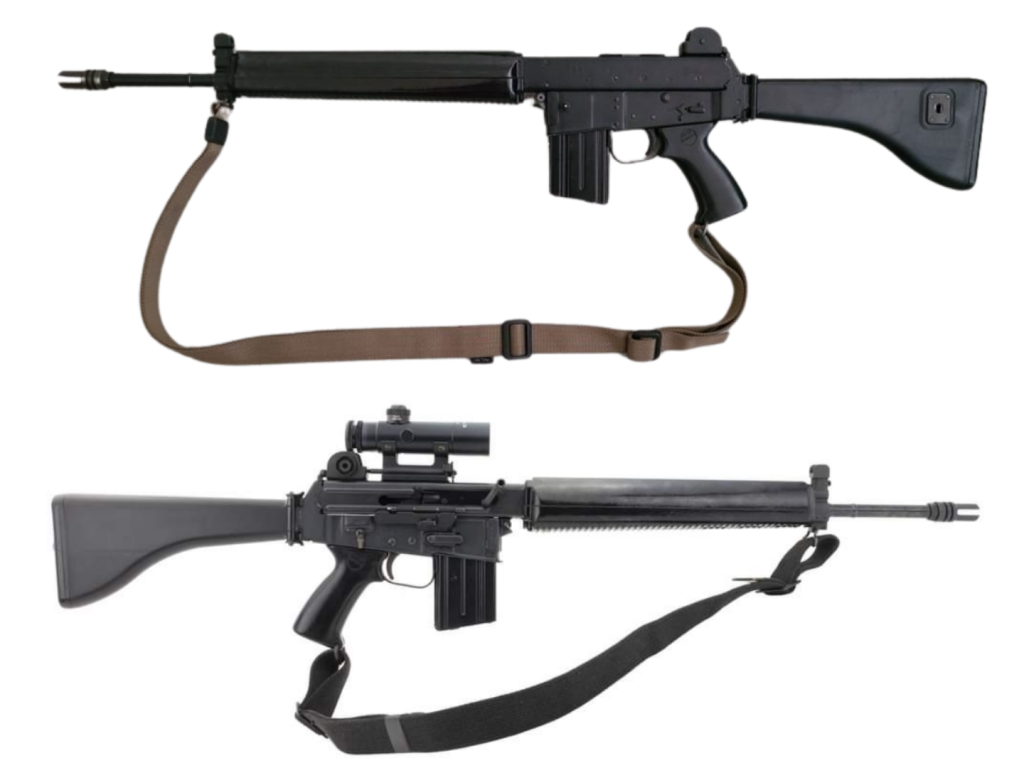
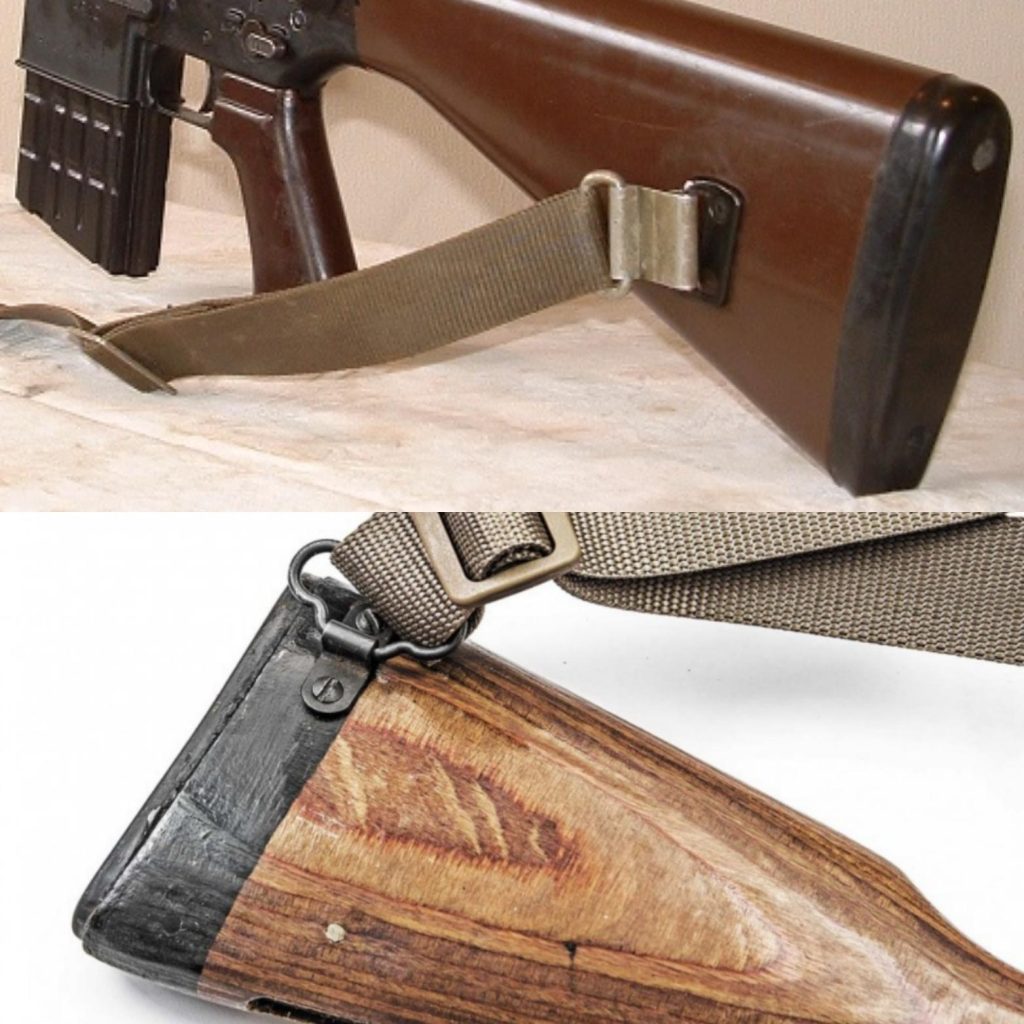
On the top is an AR-180 rocking a Magpul RLS or Rifleman Loop Sling (original image sourced from The Firearm Blog), on the bottom is another AR-180 with the sling that originally came with the rifle as it shipped from the factory. In either example you can see that there’s no way to attach the rear point of the sling to the AR-180 stock, anywhere. This would make it impossible to wear the rifle slung and still be able to aim and fire like we’re accustomed to doing with a grand majority of AR-15 permutations out there.

I asked a few friends, and the reason the rifle was designed that way was because slung over the shoulder “parade” style carry (pictured above) was the way to do it back in the day; gunfighting hadn’t yet evolved to the point where the weapon being slung while in use was the standard, and there was virtually zero aftermarket to develop solutions for such things back then. Therefore, attaching it to the grip was the most cost effective means of attaching a two point sling without adding something to what was meant to be a cost effectively mass produced rifle.

In short, it was just the times. Although it calls attention to how spoiled we’ve become in the time since as it pertains to industrial aftermarket product development to customize our tools and their ergonomics down to a level of nitpicking and splitting hairs, it’s no less odd that Stoner would have gone this route; he’d already designed and developed both the AR-10 and AR-15 before and they both had opposing sling points that allowed for a more contemporary (at the time) method of sling wear, so why not do the same with the AR-18? I don’t have that answer, but I did come up with a solution.
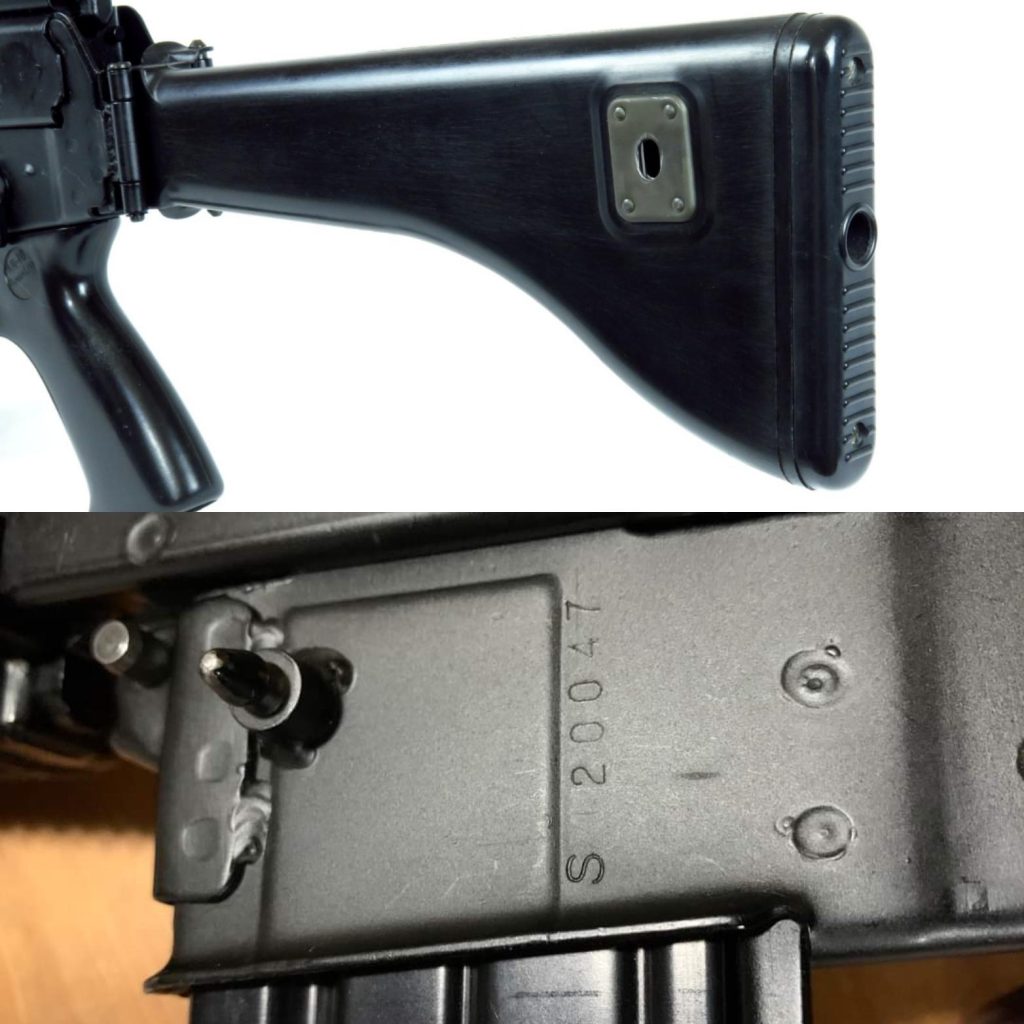
While pondering this, I noticed that the AR-18’s stock has a square plate with a keyhole looking opening in the middle. The purpose for this is so that when the stock is folded, it snaps onto this nub looking retention pin in order to lock the stock into the folded position. The BRN-180 stock does not require this since B5 engineered it to lock both opened and closed under spring tension regardless of what AR-15 pattern (or BRN-180 pattern) lower receiver one pairs the BRN-180 upper with, none of which would have the retention pin anyway.
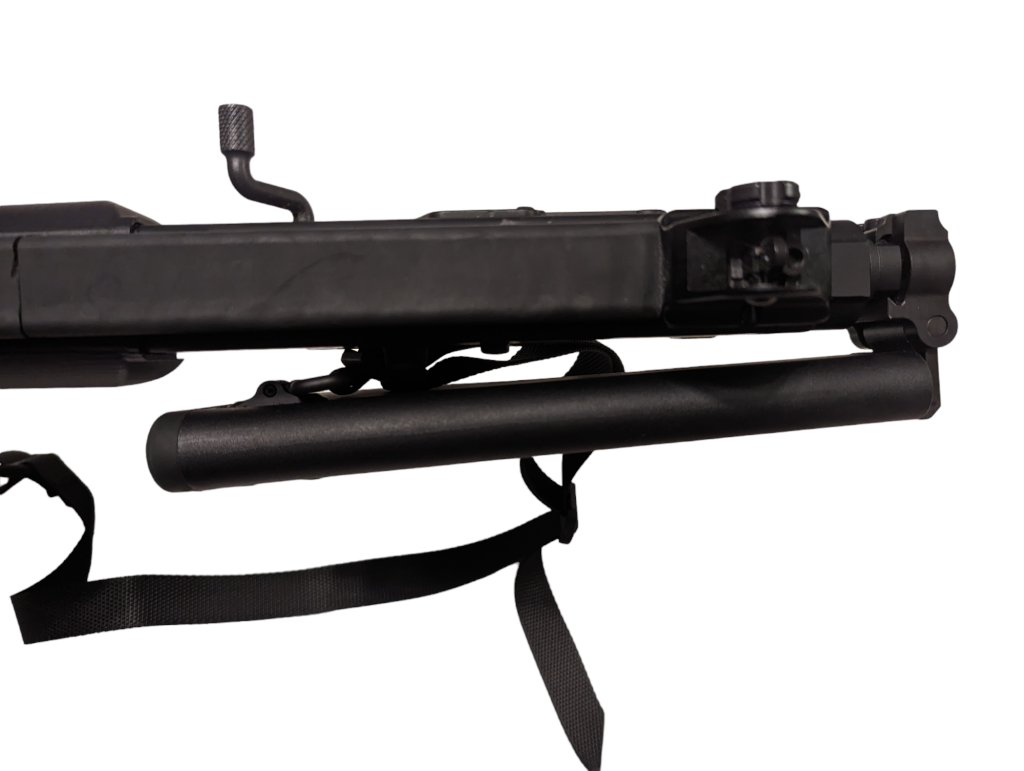
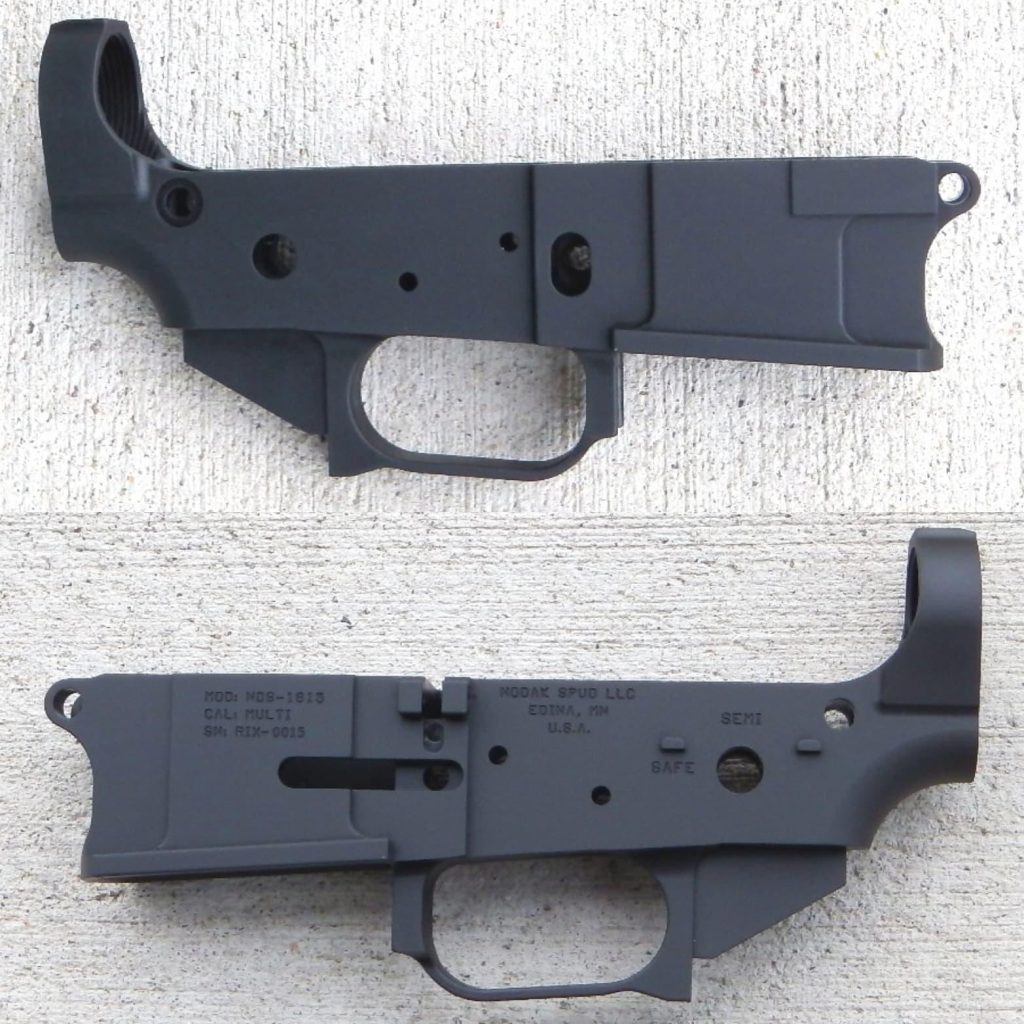
My own BRN-180 upper sits on an AR-15 pattern NDS-1815 lower that resembles that of the AR-180, designed by Ricky over at AR180 Parts and produced by Nodak Spud before they were bought out by PSA (big sad); you can see there’s no stock retaining pin there. For a brief period between the last time I wrote about my BRN-180 and now, I had Ricky’s 3D printed AR-180 style stock affixed to a LAW Tactical FSA. But I had other plans for that folder, so I needed to move it to a different rifle. I put a KNS Precision 1913 Adapter in its place and attached the B5/Brownells BRN-180 stock to it after getting my hands on one last year.
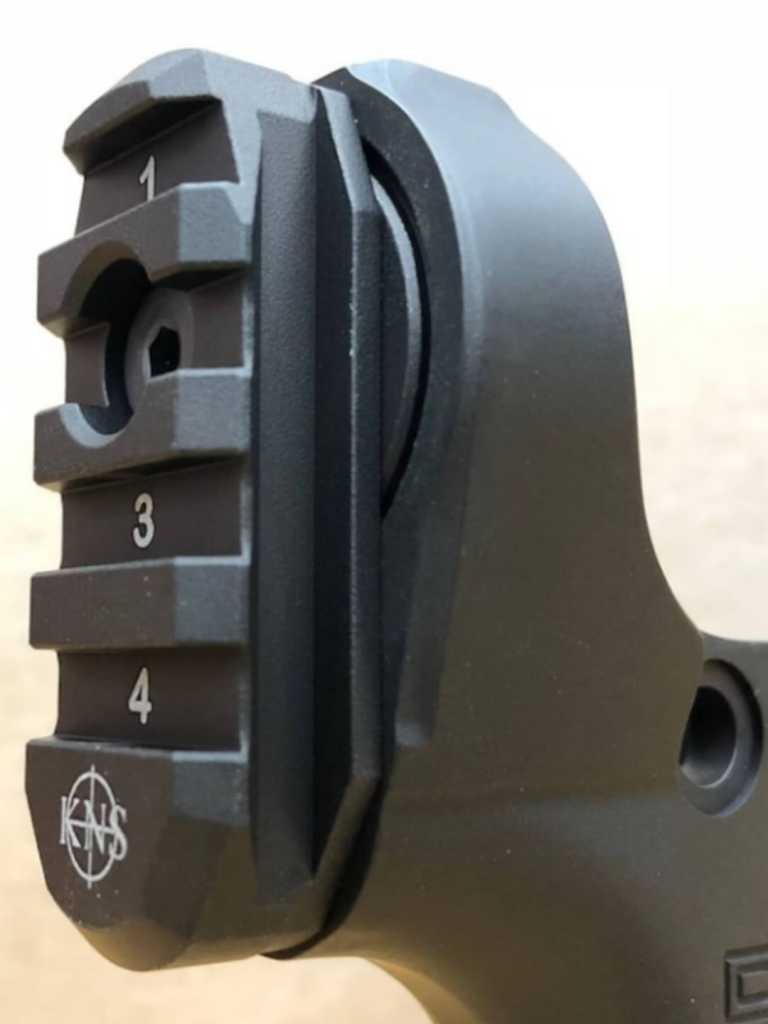
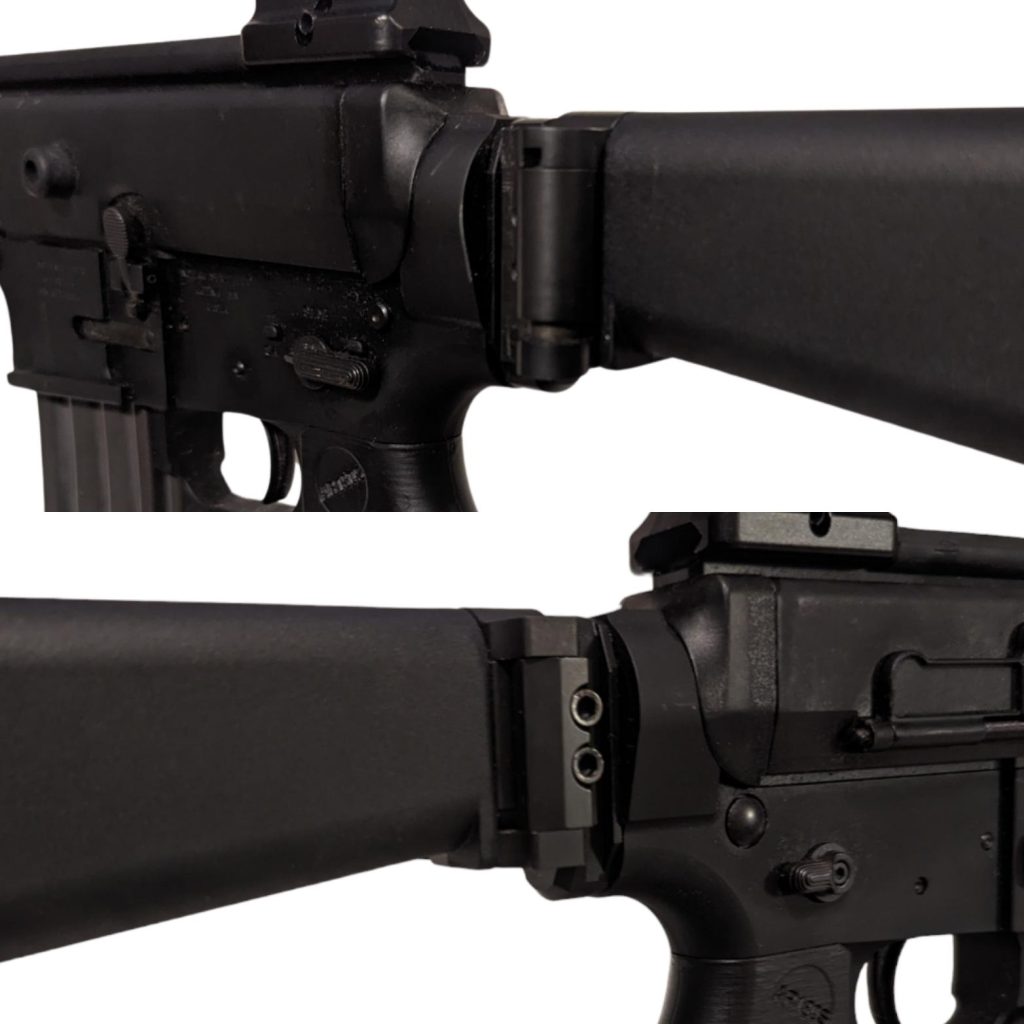
You can see that between the way the KNS 1913 Adapter interfaces with the lower and how the BRN-180 stock attaches to it, there’s no way to get an end plate mounting solution for the rear sling point. But the retention plate in the AR-180’s stock and all the real estate within the space of the likewise shaped BRN-180 stock reminded me of something I’d seen elsewhere, and it gave me an idea; an old idea, but relevant to my purposes.
We talked about how the AR-10 had both front and rear-set sling attachment points, the latter of which was situated on either the bottom of the stock at the toe like a typical fixed M16 style stock, or the left side of its fixed stock as you can see above. I’d seen sling rear attachment points on the fixed stock of AKs as well, a loop in a hinge screwed directly into the wood. Now the gears started to click; I’ve got plenty of room, I just have to figure out how to drill some holes and mount one here. How hard could that be?
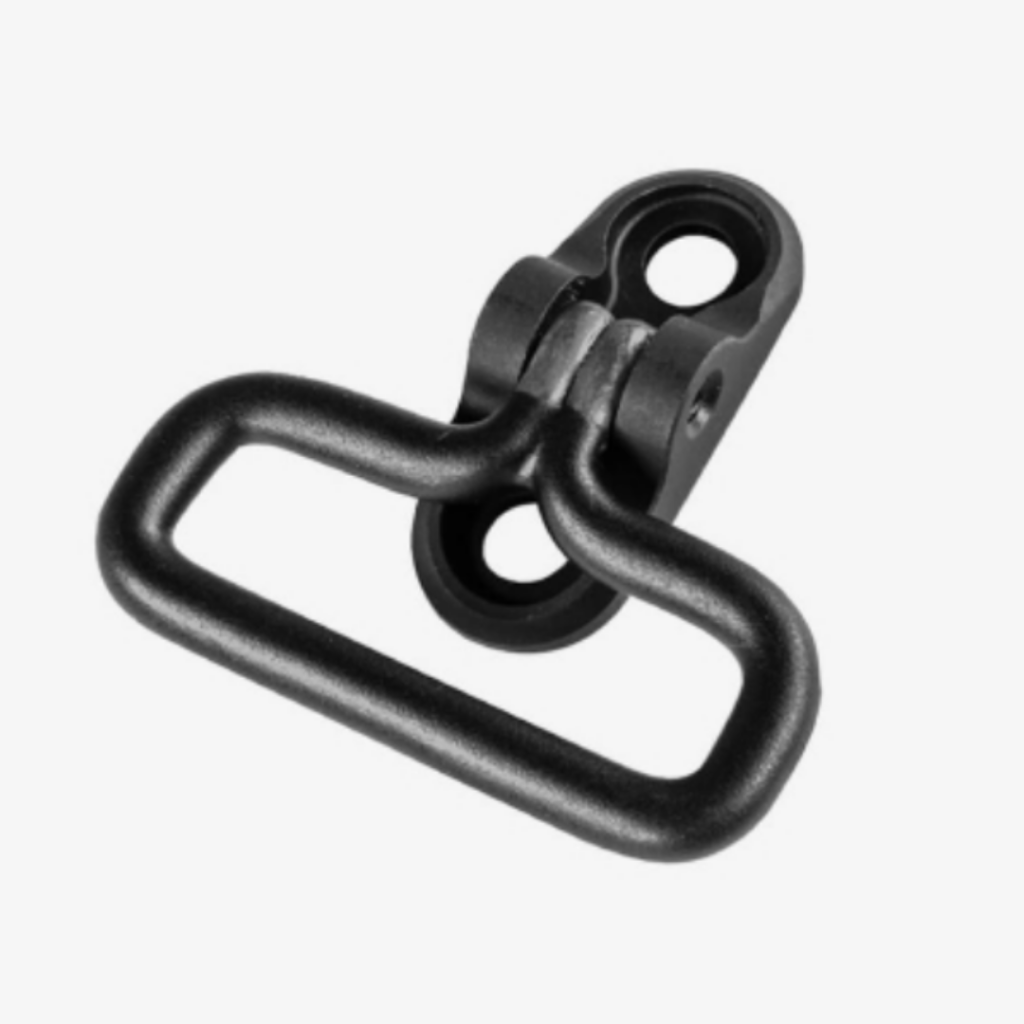
While at the local shop and indoor range to do a function test for a different rifle, I noticed a Magpul product I’d never seen or heard mention of before: the M-LOK GI Sling Swivel. I thought to myself, hey this is a cool way to put a retro vibe on a more modern rifle. Then the lightbulb turned on; I purchased two on the way out.
The whole reason I had been pondering how to get a sling on the BRN-180 to begin with was because Magpul sent over a care package that contained two of their new MS1 Lite sling, one in black and one in coyote. I had to think where to put them and which rifles didn’t have slings already; the coyote one went to the MGS4 M4A1. The black one was best suited for the all-black BRN-180, but I needed to figure out how to mount it to the rifle; here we are.
The BRN-180 stock that B5 Systems makes is pretty stout for its size; I was originally under the impression that it was mostly a solid chunk of polymer cut into shape and bored into so that threaded inserts for the stock pad and hinge could be installed. This informed my first attempt at mounting the M-LOK GI sling swivel to it, and while it worked, it was very rough and j-rigged looking and by the time I realized the stock is actually mostly hollow, it was too late.
While I was contemplating how I could have done it better, I realized I had a second B5 BRN-180 stock laying around that I had originally acquired for another purpose. I’m going to skip the story and procedure about the first attempt and skip to the second attempt, since it involved less work and turned out a lot nicer.
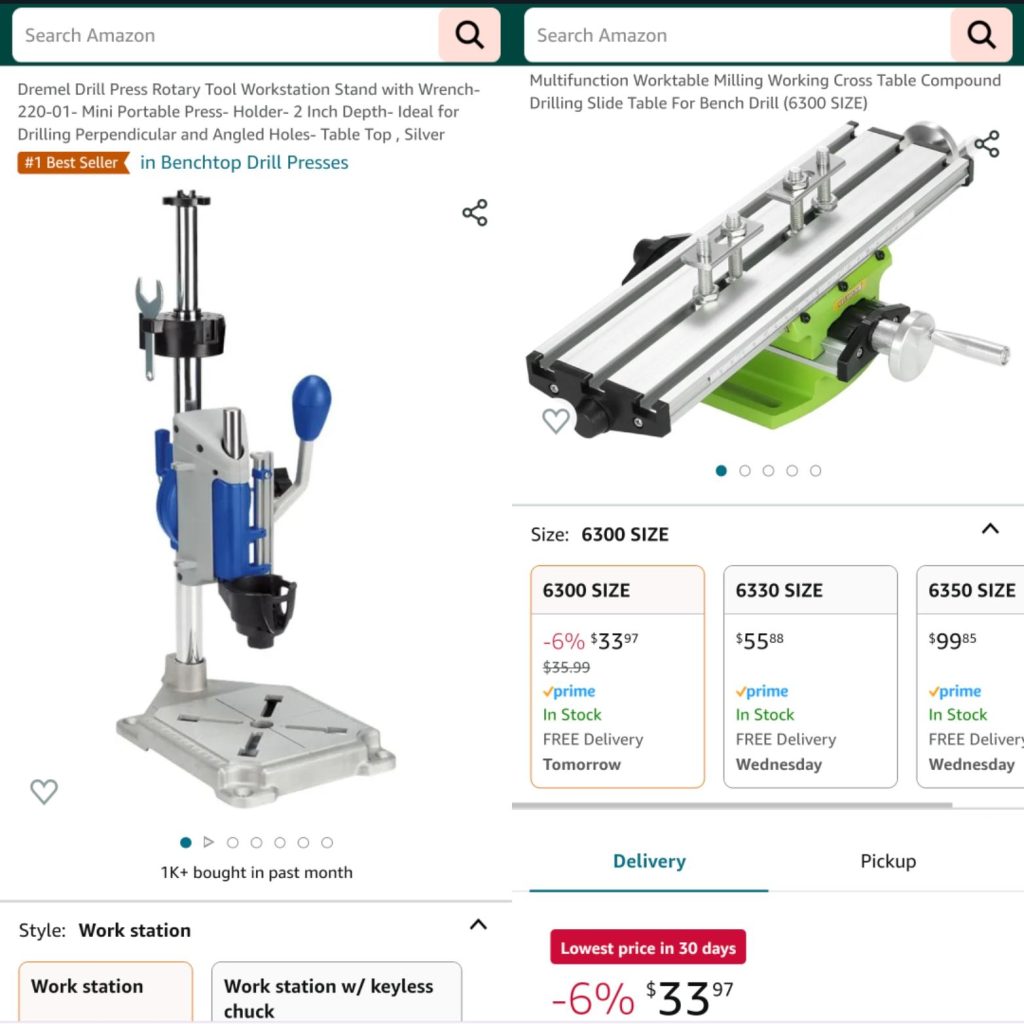
Although I knew the Dremel I have could handle the work, this was something that was going to require precision; I would not dare attempt this by just freehanding it with the damn thing knowing how it likes to run. I went to Amazon and grabbed a workstation that would turn my Dremel into a drill press (since I don’t already have one), and a milling table along with it that would let me make straight consistent passes against the Dremel bit left right forward and back. Those arrived overnight and I set them up the next day.
PROCEDURE
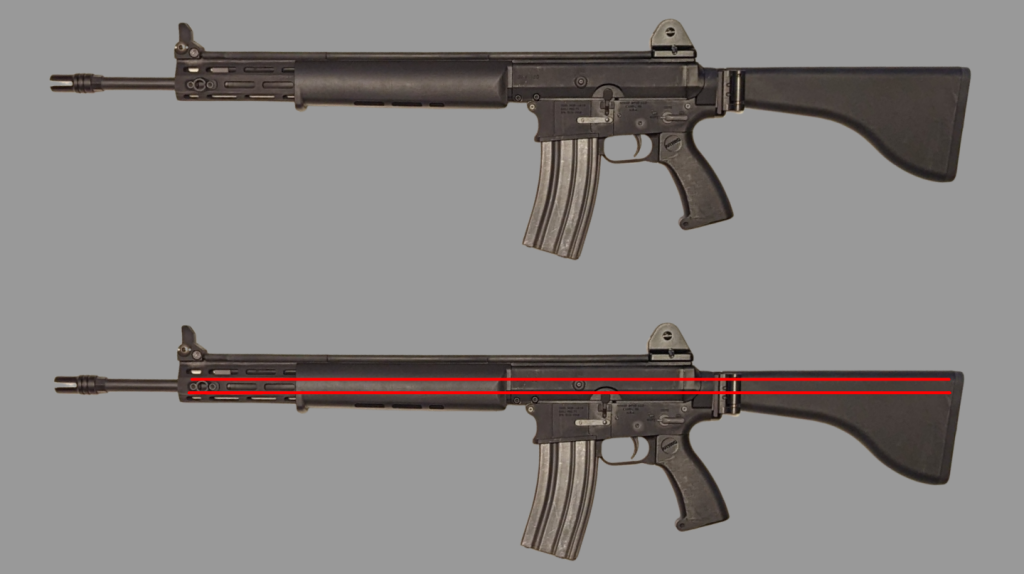
The first thing I needed to determine was the placement of the GI sling swivel on the stock. I wanted to make sure it would sit at the same height as the front sling loop that was attached to the rifle’s M-LOK rail; if you’ve ever tried slinging and shouldering a rifle with a sling that has one end mounted on the side of the rifle and the other end on the bottom (muzzle or stock end either way), or one end of the sling isn’t in line with the other end as far as their mounting points, then you know how annoying it can be when the rifle and the sling are fighting against you and you can’t get behind it easily or comfortably.
I used pictures of the rifle and marked it up relative to the front sling socket position and ended up with a height that was right along the comb of the stock. As far as lateral positioning, I determined that going as close to the rear of the stock was best as to give me enough room inside the sling to still shoulder and aim the rifle while wearing it, based on prior experience with various ARs over the years.
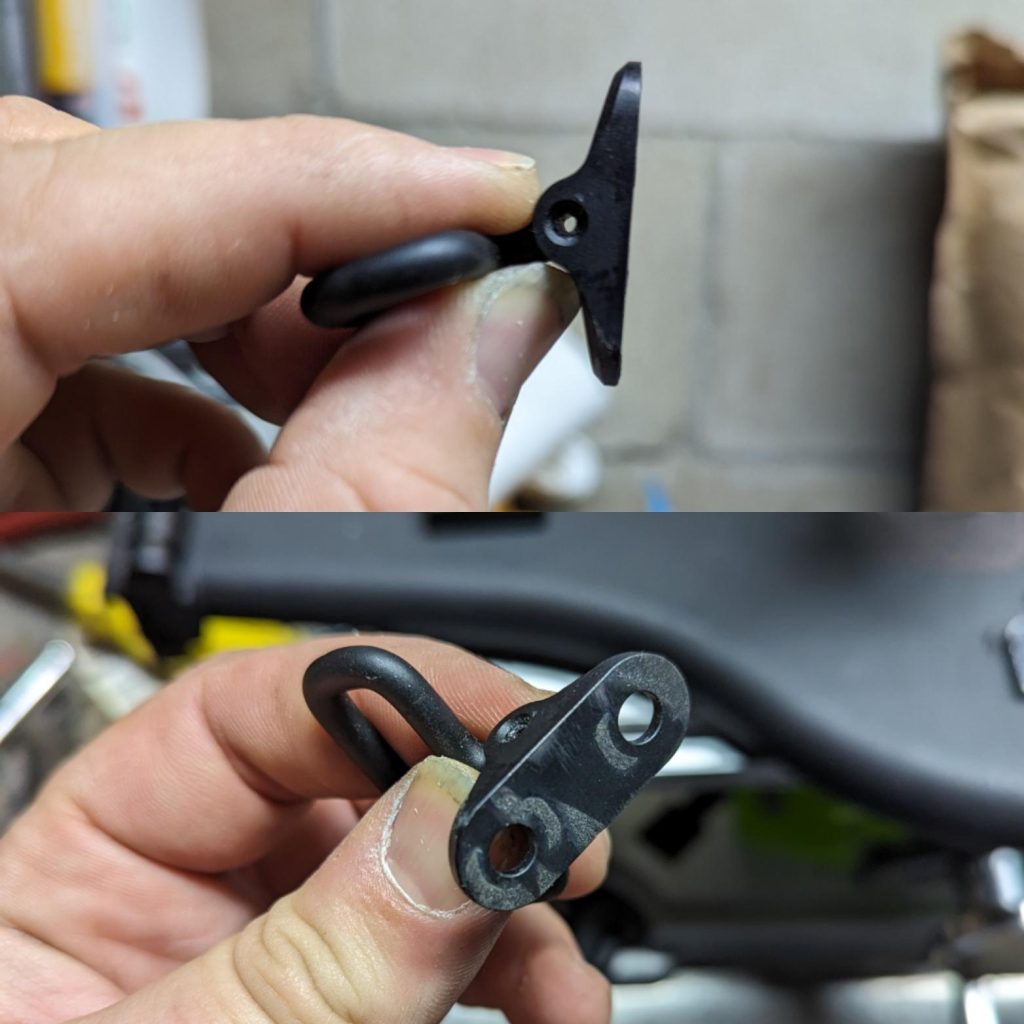
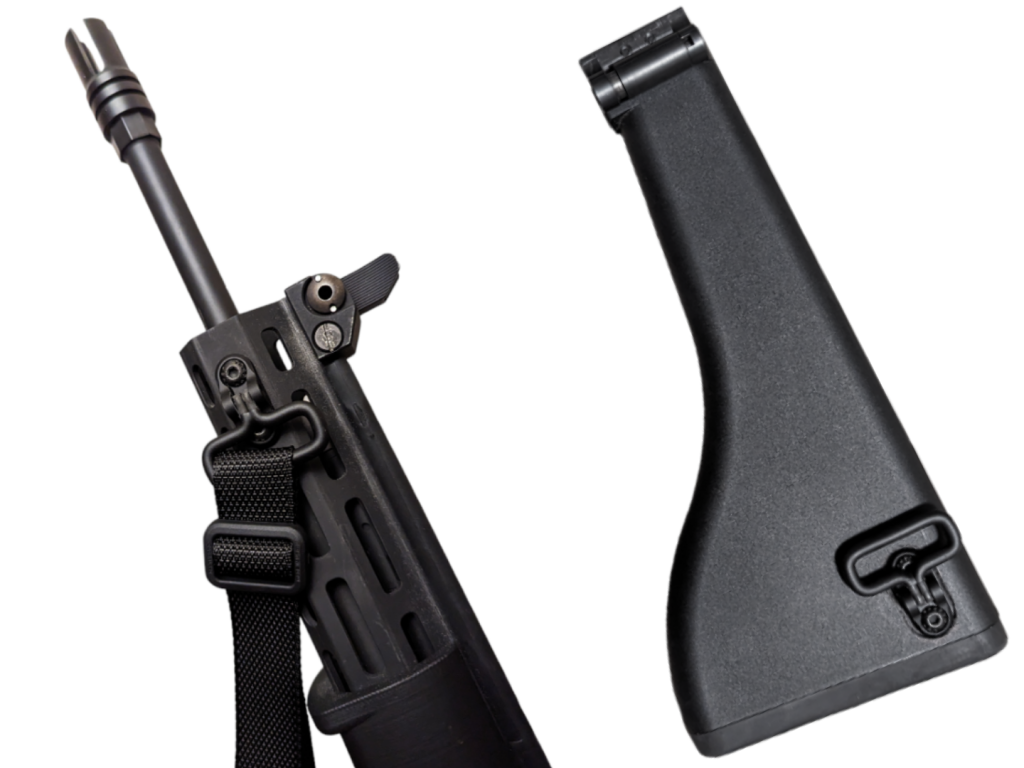
The next thing I did was get the M-LOK tabs off the backside of the GI sling swivel. This would ensure that it would sit nice and flat against the surface of the stock. After taking it to the grinder wheel, I touched it up with some Aluminum Black surface treatment. Once that was finished, I was ready to mark my cutting area relative to the render I made to determine the height.
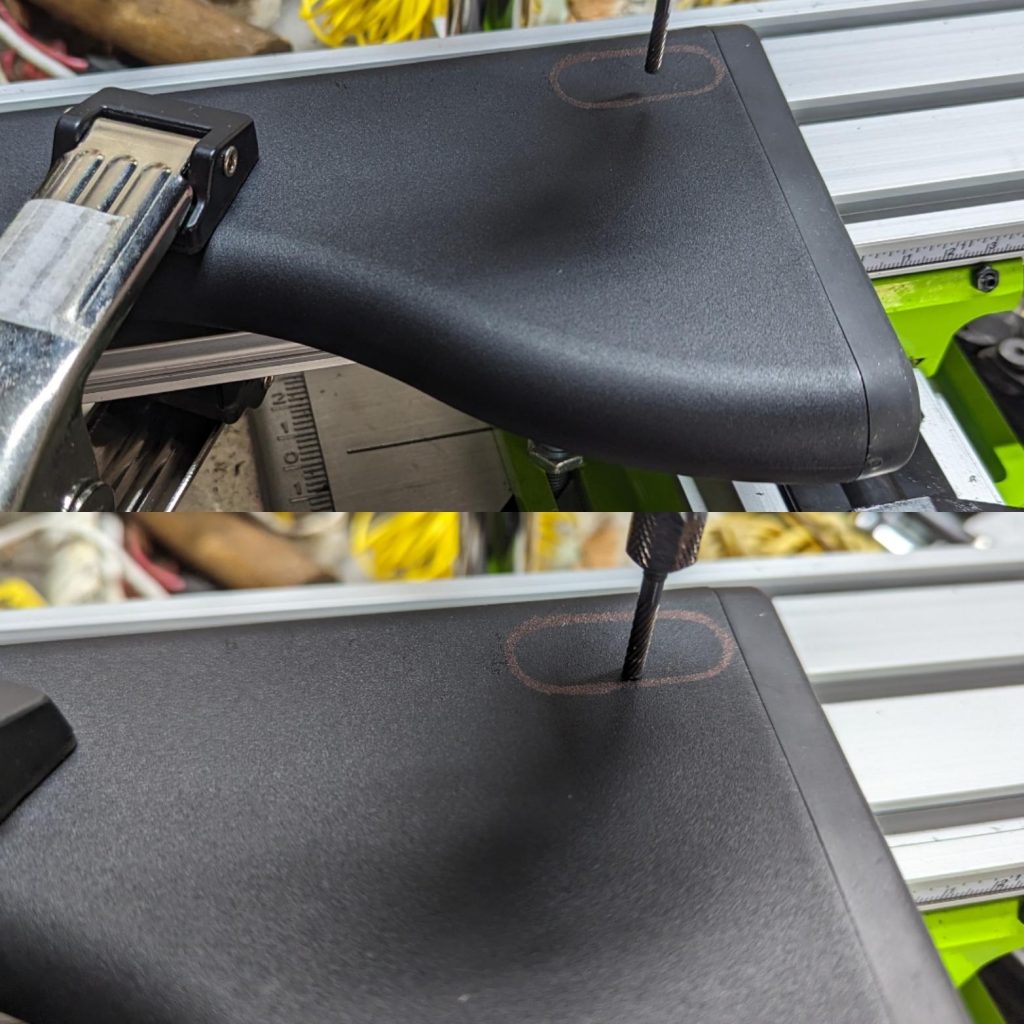
This was pretty easy; I held the GI sling swivel assembly to the stock in the aforementioned height position while making sure the top edge was level with the top edge of the stock so that everything was straight, and traced it with a sharpie. Once that was all finished, I had to set and check the cutting depth of the drill press to make sure the bit only partially cut into the wall of the stock; the objective was to mill out a pocket in the polymer for the sling swivel to nest into. Once that was done, it was time to turn on the dremel and get to work.
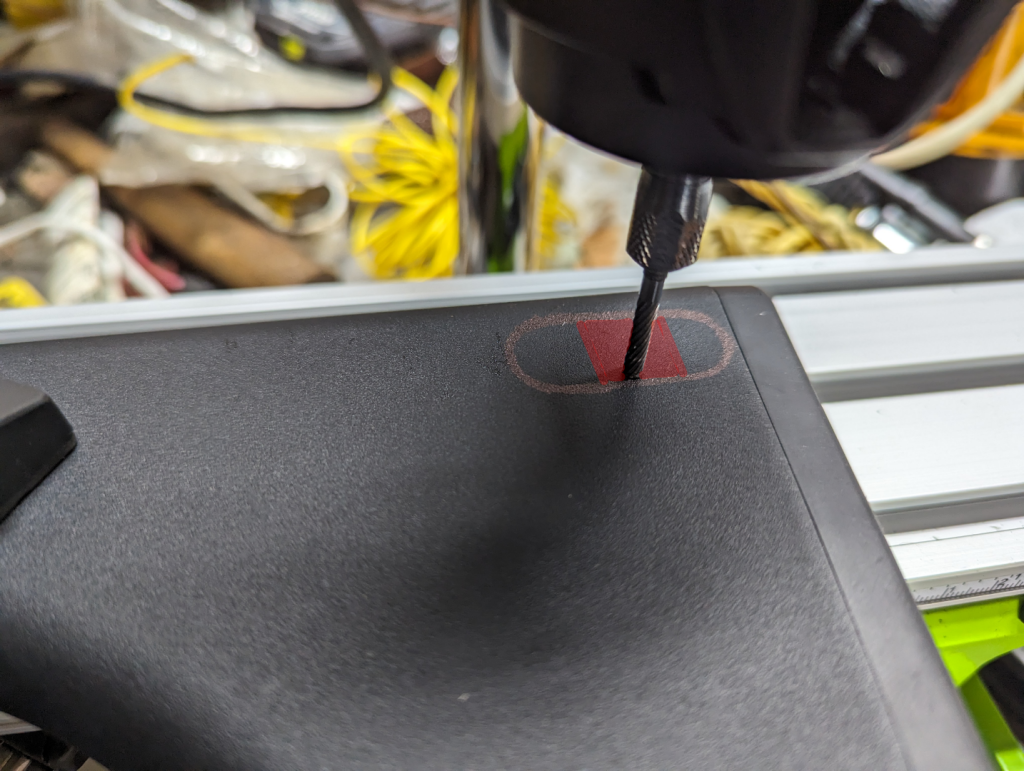
The next step was to prepare for the step after that; because the corners of the pocket for the sling swivel were to be rounded, I had to come up with a creative way to cut them just so while being limited to up/down/left/right movement along the milling track. I certainly wasn’t going to try to work both axes at the same time to create a curved cut. Having figured out how to do that already, I had to make room to do the work. Knowing that I was going to be cutting within the sharpie outline and not so much over the outline itself, I cut a square in the center of the traced shape (I’ve indicated this area in red in the above image) so I could put a round peg in a square hole, so to speak.
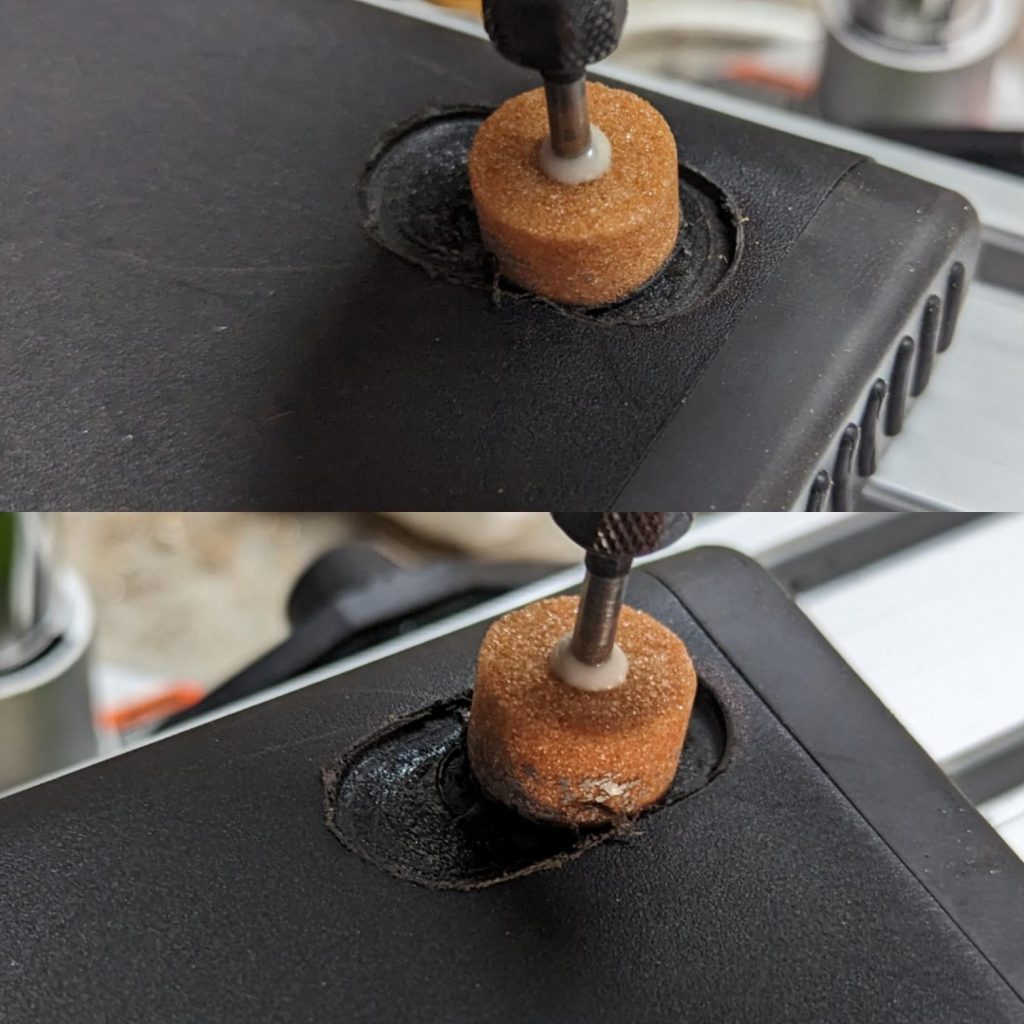
Improvisation requires a little imagination, and this time I hit the nail on the head. Using a circular grinder wheel Dremel bit which diameter fit within the height dimensions of the traced shape, I lowered it into the square cutout I made and it sat at the desired pocket depth I made with the milling bit. Then it was just a matter of moving it left and right along the milling track axis until I pushed out to the rounded left and right limits of the traced shape at the same depth I had previously cut.
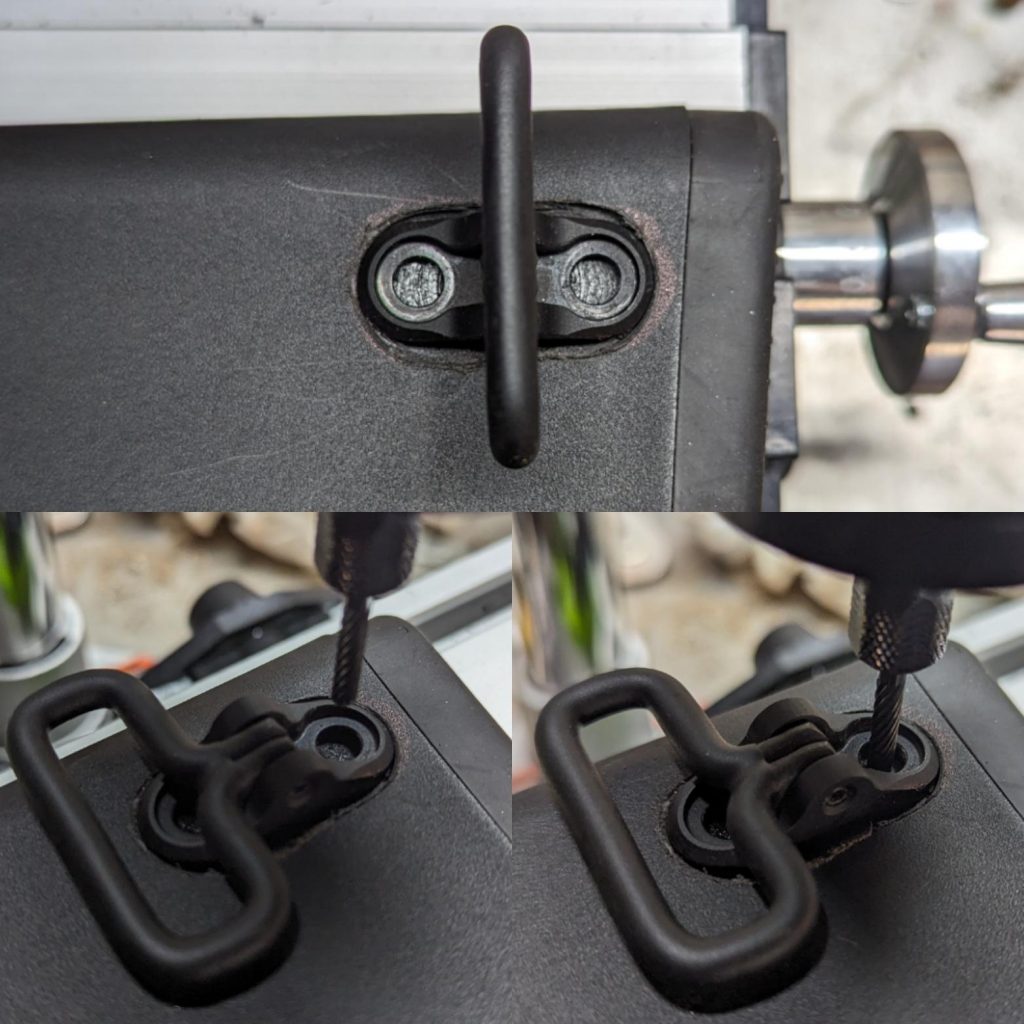
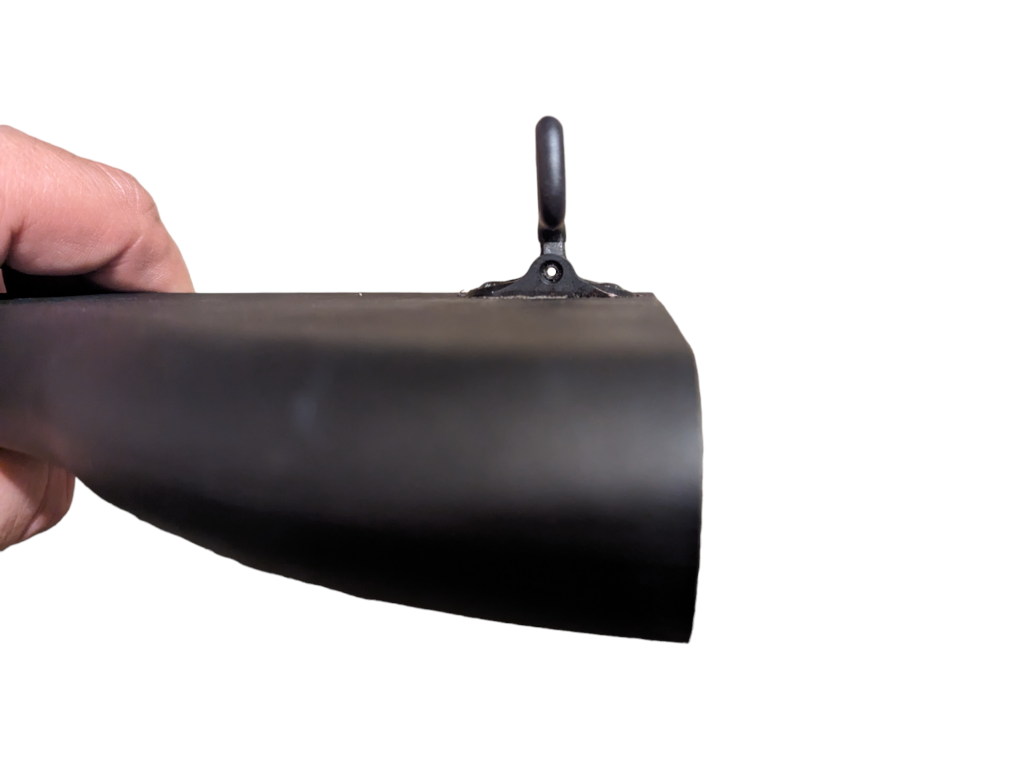
Now that the sling swivel fit into the recessed pocket snugly enough to push it in with a snap, it was time to drill the holes for the screws. There was no guesswork here; I used the existing holes for the M-LOK t-nut screws to guide me and ensure they were level and concentric to the t-nut screw holes. I put the milling bit back on the Dremel and dropped it down until I felt it bore through the wall of the stock, being careful to avoid hitting the opposite wall of the stock.
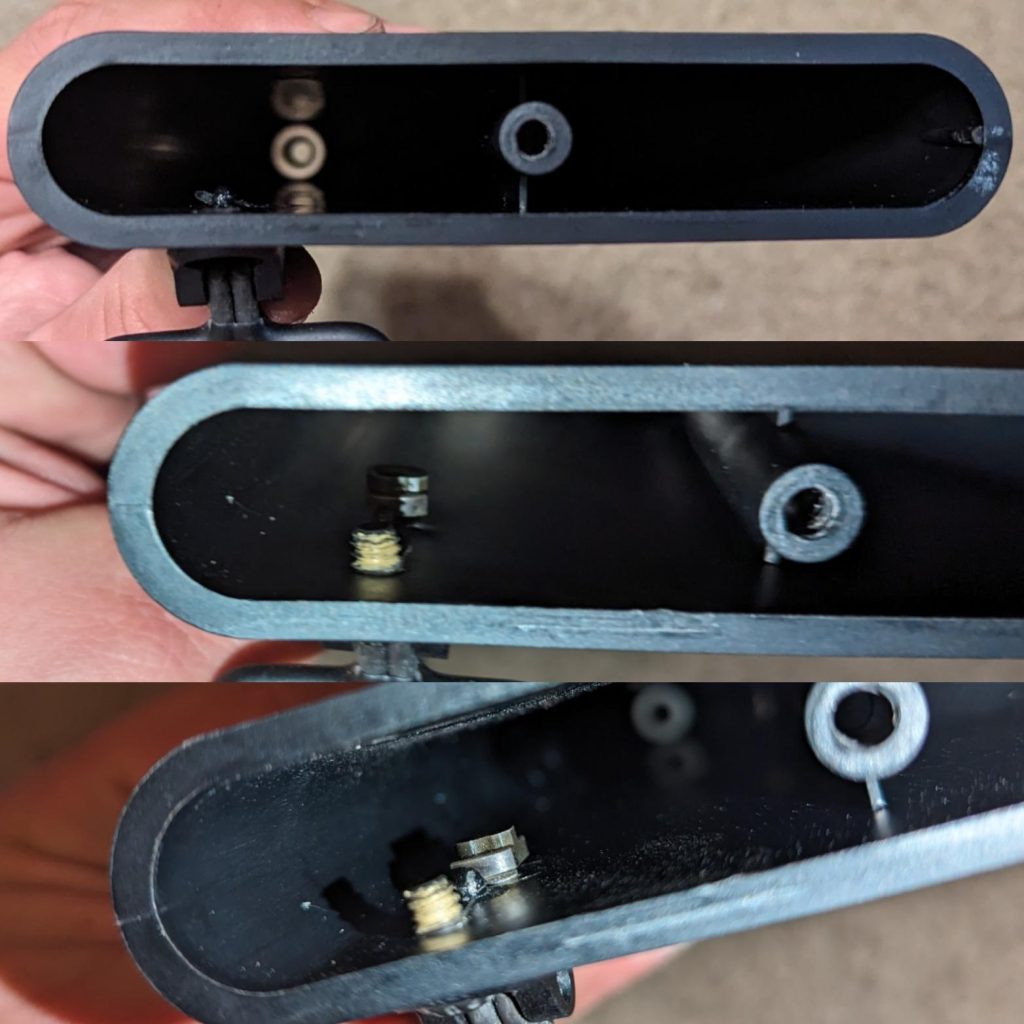
The hard part was over. Now it was time to put it together and seal it up. Using an ⅛” allen key, I started the original M-LOK screws through the holes I’d just drilled, sort of tapping the holes in the process. The point was just to get the screws through as far I needed them to be; I only had to screw them in because the hole diameter was a smidge less than the screws themselves. Using the t-nuts as securing bolts essentially, I started with the one that’d be closer to the receivers since it was easier to reach with a pair of pliers to hold the t-nut in place while torquing the screw down so it wouldn’t spin with the screw, with nothing in the way of the pliers.
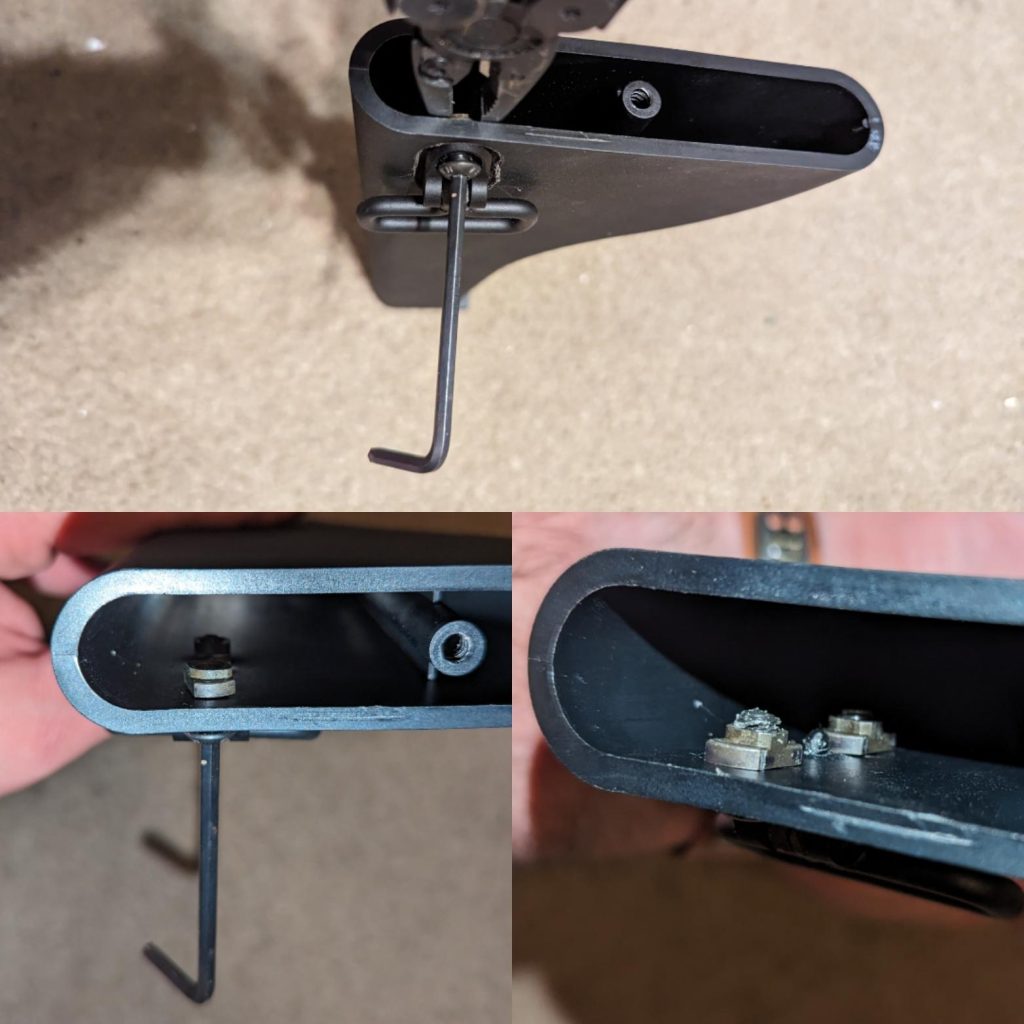
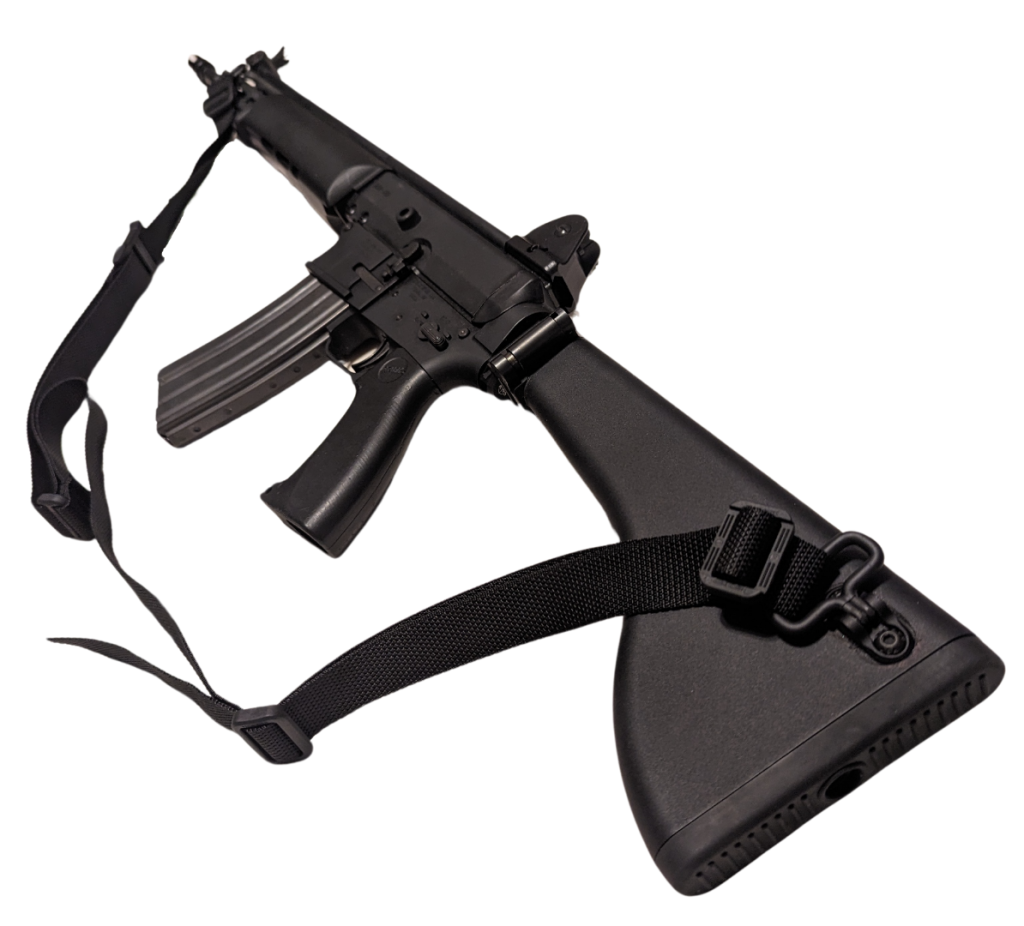
Once that was secure I just had to repeat the process with the screw closer to the buttpad of the stock, and then reattach the buttpad, which completed the buried fasteners modification. Nice and clean. Recessing the sling swivel into the wall of the stock ensured that I’d be able to reuse the M-LOK screws that came with it, and prevented it from sticking out right off the surface of the stock and becoming a snag hazard while keeping it streamlined. Now all I needed to do was reattach the stock to the rifle, and then attach the sling.
FUNCTION CHECK
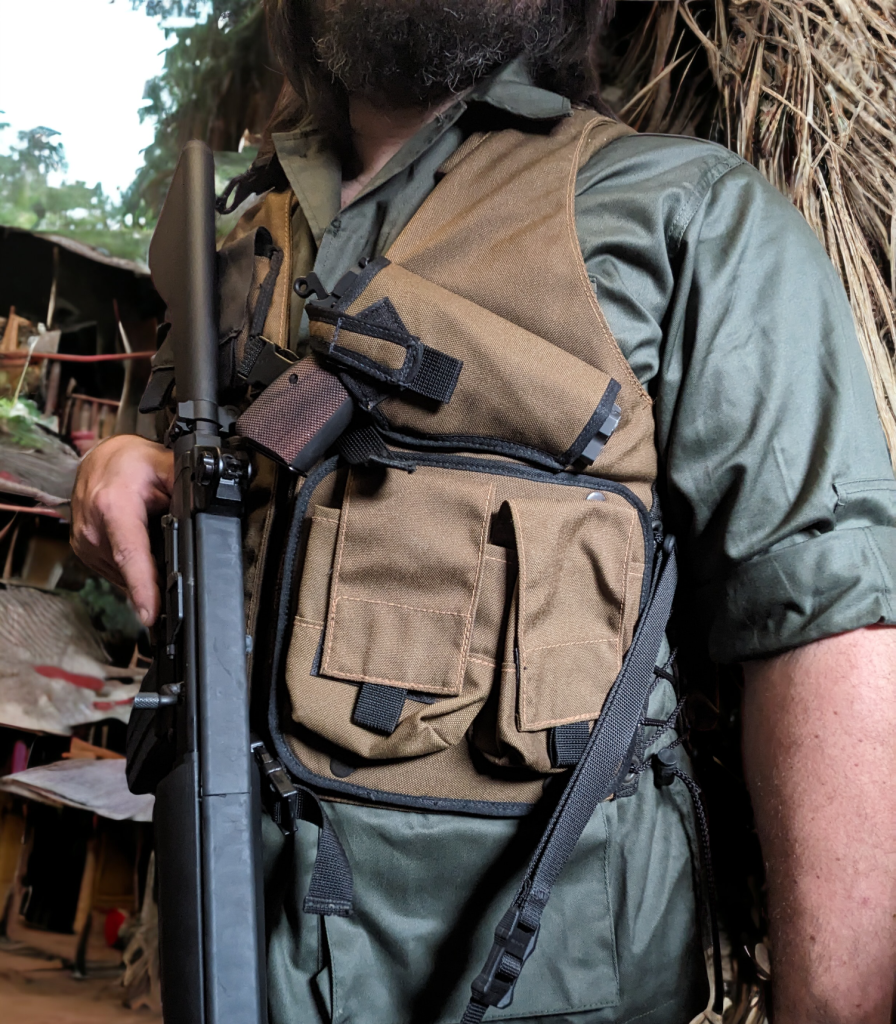
Once the sling was attached and I finally slipped into it, I smiled with satisfaction. Not only was the attachment snug and secure, but I could both wear and aim the rifle with relative ease; the sling swivel placement on the front and back of the rifle was perfect. With the sling draped over my strong side shoulder, across my back, and under my support side arm, the slider for the MS1 sling was right where it needed to be to reach and manipulate with my support hand.
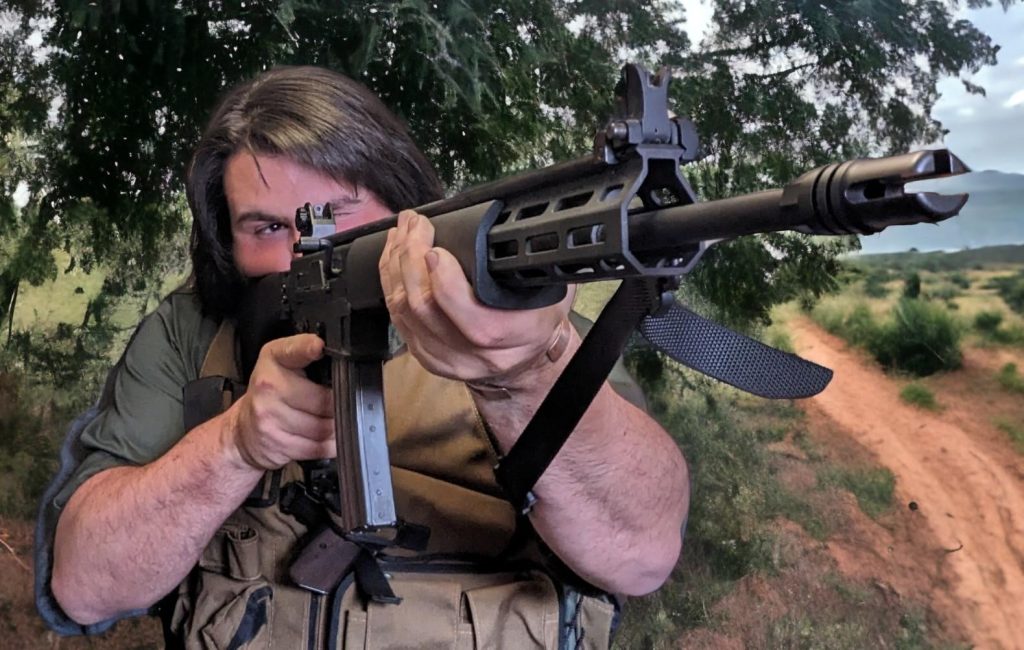
Functionally speaking, this works out really well once you take enough slack out of the sling to brace against it and tighten up your hold on the rifle. On the way up to the rifle from coming up from around my back, the sling provides a classic resting point for my support side forearm; tightening the sling enough makes it feel like the rifle is resting in a barricade, without pulling or pushing the rifle off my point of aim. The sling swivel doesn’t touch my face at all once I get a proper cheek weld.
Loosening the slack with the slider allows for more weapon mobility; tightening the sling to the max keeps it snug to my chest without swinging around, good for administrative purposes or if I need my hands for something else.

All the while it looks appropriately retro all together, which was the goal. At the end of the day, this experimental modification was a success and is easily repeatable for anyone out there wanting to do it on their own. I would strongly recommend it if you do have a BRN-180 that’s configured to resemble the AR-180 by using the B5 stock because this is the only worthwhile way to mount and use a sling relative to modern doctrine and technique.
OTHER MODIFICATIONS
The other things I’ve done to my BRN-180 (besides the stock stuff I mentioned above) since I previously wrote about it are easy to go over, so I’ll make it quick:
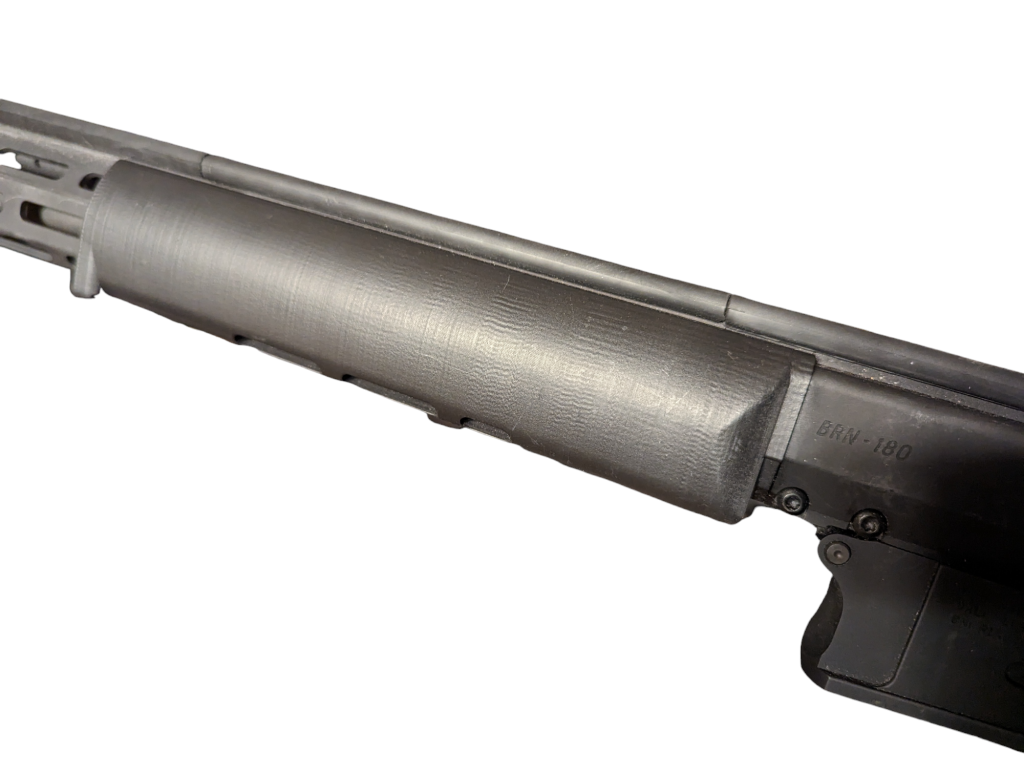
Extended 3D printed AR-16 style BRN-180 slip over handguard, one piece version. Ricky over at AR180parts.com figured out how to make this component with one solid piece of printed material instead of two pieces like he had last time.

This length of BRN-180 handguard was originally my suggestion; the first version was shorter by the length of about one M-LOK slot, and it looked a little silly on the longer rifle. I asked Ricky if he could do it about one slot length longer based on the AR-16’s handguard it was originally based on, and when he tried it out he said it was awesome. However, it was originally two separate pieces due to manufacturing limitations. When the one piece version came out, I jumped on it right away and gave it a coat of matte black rattle can to finish it off.
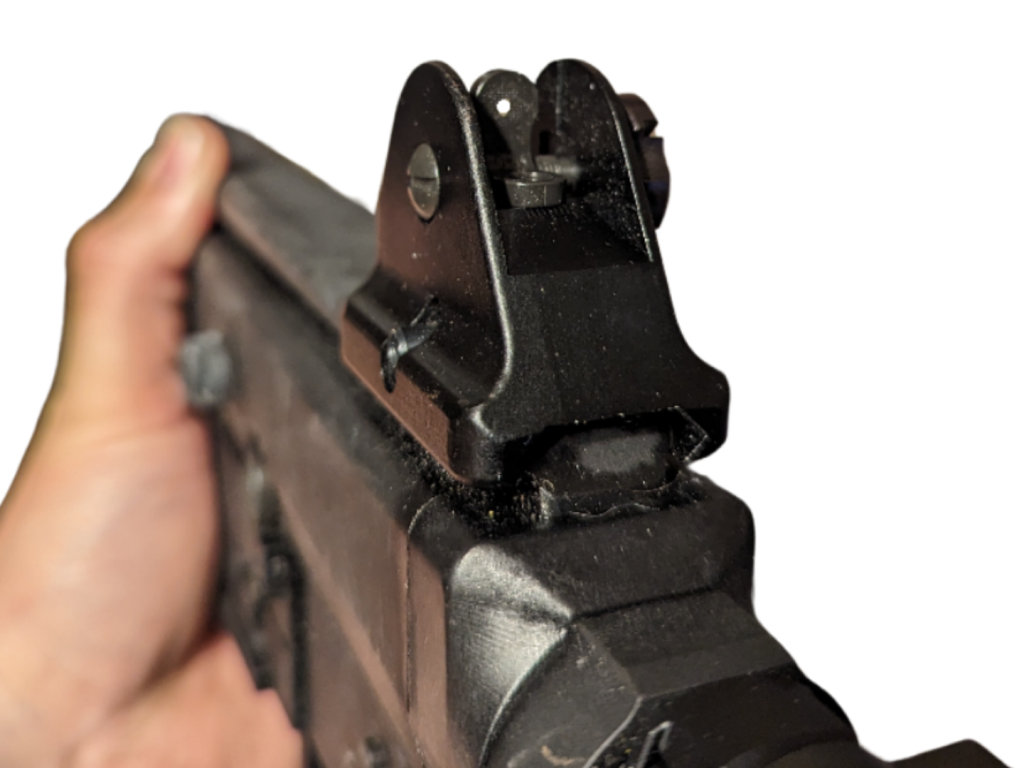
T91 Simple Rear Sight: Retro looks (closer to the AR-180’s aesthetic at least) with AR style adjustment. After the unpleasant experience that was zeroing my HK416 take-off diopter iron sights, I decided I would much rather have AR style irons I was used to zeroing over the years. I had my eye on the T91 Simple Rear Sight for a while but had to wait for them to come back into stock. When they did, I grabbed one and paired it with an M4 shaped Troy Front BUIS, left in the upright position. Retro aesthetic enough with standard AR function, I’ll take it.
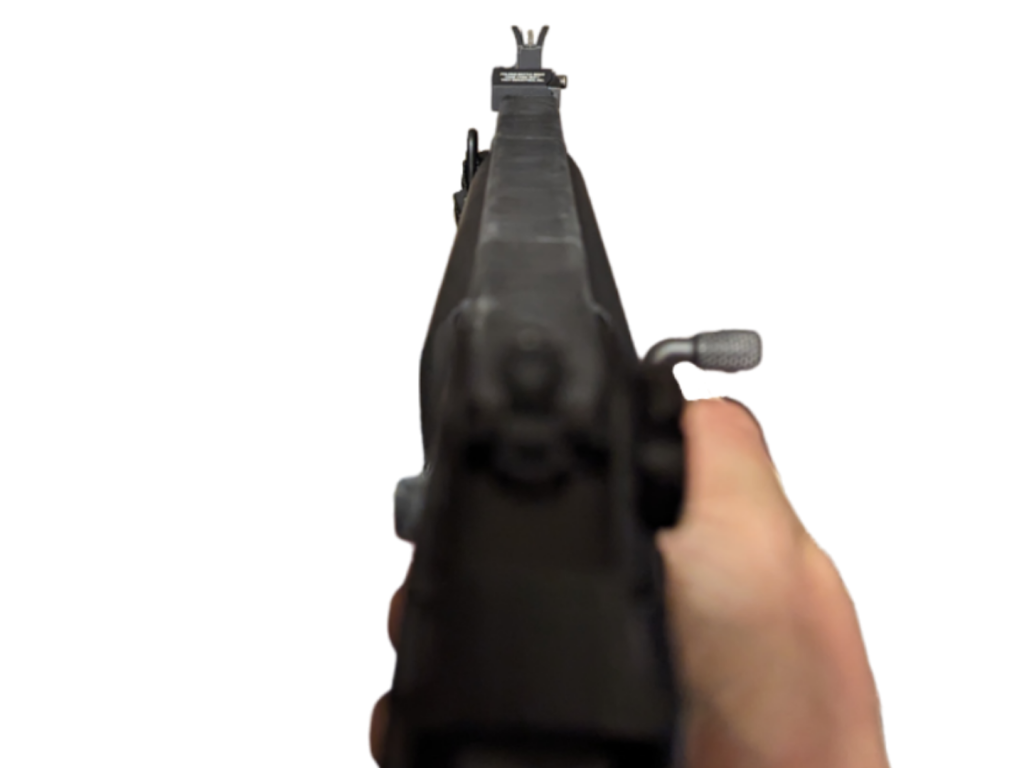
Top rail “delete”: I did this easy, just grabbed a bunch of the flat rail cover joints ERGO Grip used to make that were left over on eBay and put them between the front and rear iron sights along the top rail. Simple, effective, reversible. Done deal.
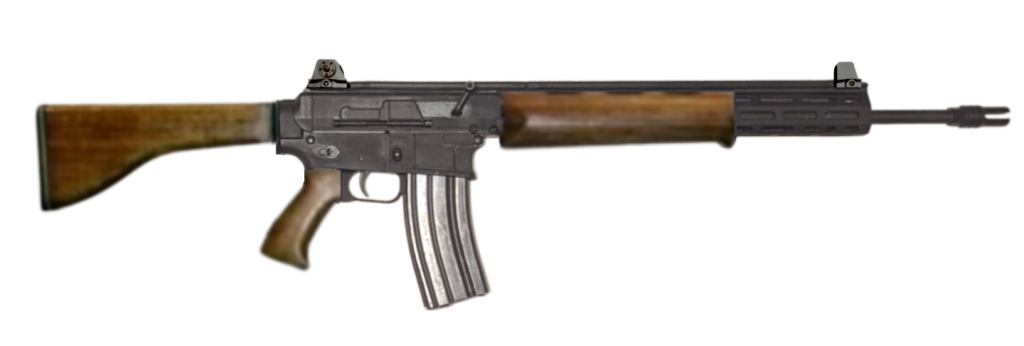
I think that’s all I’ve got left to do to this rifle at this point. I could add a scout light to the right side of the rail up front and make it look like it fit the retro look and was j-rigged to the “heat shield,” but I’m not in a rush just yet. What I would like to do is get a set of furniture– the handguard, stock, and grip– made of walnut wood and really give it an old school AR-16 like look. But finding someone to do it has been hard enough, and even if I did it wouldn’t be cheap.
Keep your eyes peeled for future additions to the XMOD series; there will be more.
Stay Dangerous
Stay in this L.A.N.E.


